
DIY - ANKARA COVERED BAG &SHOES (PART 2)
- Nma

- Mar 27, 2020
- 3 min read
This the concluding part of a 2-in-1 DIY tutorial again because a bit of left over fabrics after part o e of the project.
The Shoes...
If you’ve seen my previous post i.e the first part of this tutorial, you should already have a general idea of the technique used so far. If you haven’t, *link* you’re welcome 😉 .
Materials
Old shoes

Ankara Fabric

Glue

Fabric Glue

Applicator

Scissors
Fabric Marker
Bias Binding
Measuring Tape
Razor Blade
Pegs
For easy understanding I will group this DIY into 4 major steps
Step 1 - The Body
Measure the length and width of the strap.
Multiply each measurement by 3. Use these new figures to cut out 2 rectangular pieces of the Ankara fabric.

Apply glue to the top of the straps and place the fabric centered over the glue.

Mark the edges of the straps with a pen, slit on the marked lines with a razor blade and trim off the excess fabric with a pair of scissors.

Seal the excess fabric under the straps by first gluing one side folded in over the back of the straps and the second side folded in over the first.

Hold in place with pegs and set aside to dry properly

Measure the length and breath of the back part of the shoes, add about 3 inches to each measurement and cut out a rectangular piece of fabric each using that measurement.

Apply glue to the area and place the fabric centered on top of the glue. Do this for both legs. Allow to dry for a bit

Mark the border between the back and the heels with a pen, slit across with a razor blade and trim off the excesses with a pair of scissors.
On the top curve, allow for about half an inch before trimming off the excess fabric. See the bottom right frame in the picture below.

Hold down with a peg and allow to dry properly

Step 2 - The Heels
Cut 2 rectangular pieces of Ankara fabric with measurements two times the length and breath of the heels.
Cut diagonally across the grain as seen in the top left frame of the picture below.
Apply glue to the soles of the shoes and place the fabric with the diagonal side across the top of the soles.
Set aside and allow to dry properly.

Step 3 - The Insoles
Carefully peel the insoles off the shoes.
Apply glue to the top of the insoles.
Place a wide piece of cloth over the glued area making sure to leave about 1 inch allowance.

Leave half an inch allowance and cut out the outline of the insoles.
Cut little slits around the allowance.
Apply fabric glue to the inner edges of the insoles round and fold the extra fabric over the glue.

Apply top bond and glue to the sealed insoles and replace them on the shoes.

Step 4 - Finishing
Neatly trim off the edges of the fabric around the soles.

Make a bias strip with the Ankara fabric
Apply glue on the strip and cover the insides of the back of the shoes as shown below.


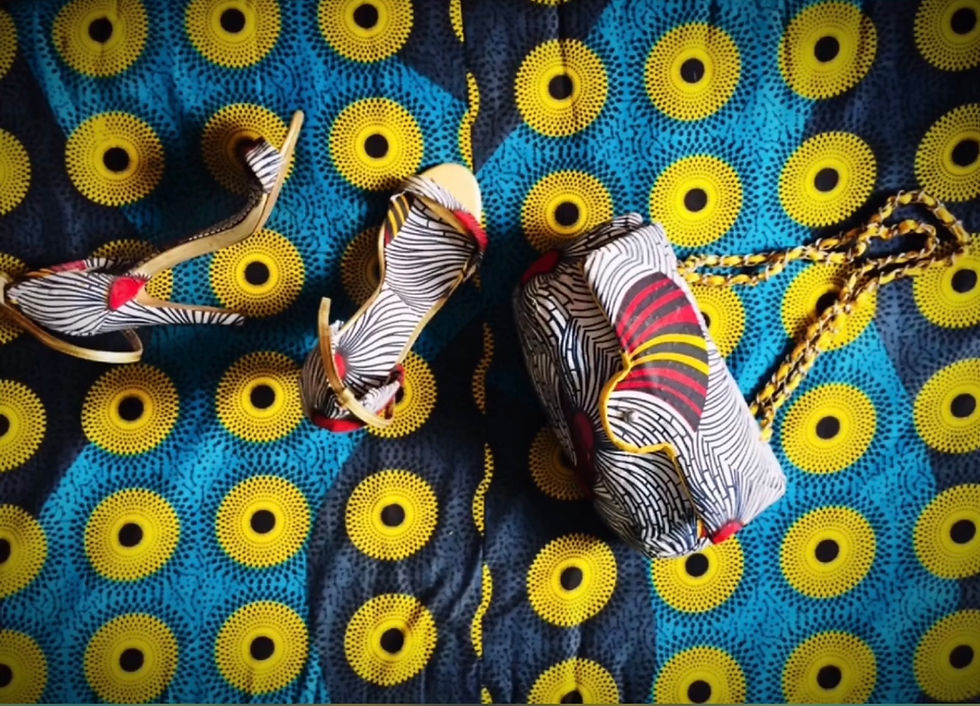
Final Look!
General Tips
Check the edges of your shoes to make sure they are tightly bound to the soles before starting the project. If they are not, have them sewn in place by your local cobbler
Be strategic about positioning the patterns of your Ankara fabric. Here I made sure to use the parts that showed the red designs.
When Slitting with a razor blade, be careful not to slit too deep so that it doesn’t go beyond the fabric. If you’d prefer, use a slightly blunt razor blade.
Please the video below for more details.
Enjoyed this blog post? Share it with a friend!
Replicating this DIY? Tag me on the gram!
Have any other questions? Leave them below and I’ll be sure to respond!
Roll the credits xx


Comments