
DIY - ANKARA COVERED BAG &SHOES (PART 1)
- Nma

- Mar 26, 2020
- 3 min read
Updated: Mar 27, 2020
This one part of a 2-in-1 DIY tutorial.
What do you do when you have a rundown bag and left over Ankara fabric? You give the bag a new life.
Let’s make magic together
Materials
Old Bag

Ankara Fabric

Glue

Fabric Glue

Applicator

Scissors
Fabric Marker
Bias Binding
Measuring Tape
Razor Blade
20 Steps...
Step 1
Take off the straps of the bag.

Step 2
Open up the flap of the bag and lay it flat on the table. Measure the length and width of the opened up area as seen in the picture below.


Step 3
Add about 3 inches to both the length and width measurements gotten from step 2 above and use the dimensions to cut out a rectangular piece of the Ankara fabric.

Step 4
Lay the bag flat on the table and apply some glue to the area as shown in the picture below.

Step 5
Place the previously cut out fabric on the area with the glue making sure it is centered properly. Smoothen it carefully with your hands and hold down with a flat heavy book. Leave it to dry before going on to the next step.

Step 6
Apply some glue to the sides of the bag and pat down the excess fabric around the edges.

Step 7
Make 2 slits at the top of the flap and glue down the remaining edges neatly like I have done in the picture below. Allow to dry for a bit before moving on with the project.

Step 8
Trim off the excess around the edges of the curved part of the flap

Step 9
Measure the opposite side of the bag making sure to start from the inside of the bag as you can see in the picture below.


Step 10
Add about 3 inches to both the length and width measurements gotten from step 9 above and use the dimensions to cut out a rectangular piece of the Ankara fabric.

Step 11
Apply glue to the bag and place the piece of fabric neatly starting on the inside of the bag. Glue down all the edges as well and set aside to dry for a bit.


Step 12
Measure from side to side across the bag as seen in the picture below, add about 6 inches to the measurement gotten. Note this as your length.
Also measure the width of the same area, multiply ice measurement gotten by 2. Note this as your width.

Step 13
With the length and width measurements noted in the above step, cut out a rectangular piece of fabric.

Step 14
Fold in a quarter of the width measurements on both sides of the width and glue down with fabric glue. Allow to dry.

Step 15
Apply some glue to the surface of the wrong side of the strip from step 14 above.

Place the strip across the bottom of the bag laying it from one side to the other side. Leave the same amount of excess fabric at both ends and fold them inside the bag as well. Allow to dry.

Step 16
Measure the length and width of the inner flap area.


Use this exact measurement to cut out a rectangular piece of fabric.

Apply glue to the area and place the fabric neatly over the area.

Step 17
Apply glue to the curved part of the flap and place a piece of fabric over it. Allow to dry and trim off the edges


Step 18
Use the yellow bias strip to cover the raw edges of the inner flap by gluing it down around the border with fabric glue.

Also glue the yellow bias strip across the curved edges as seen below
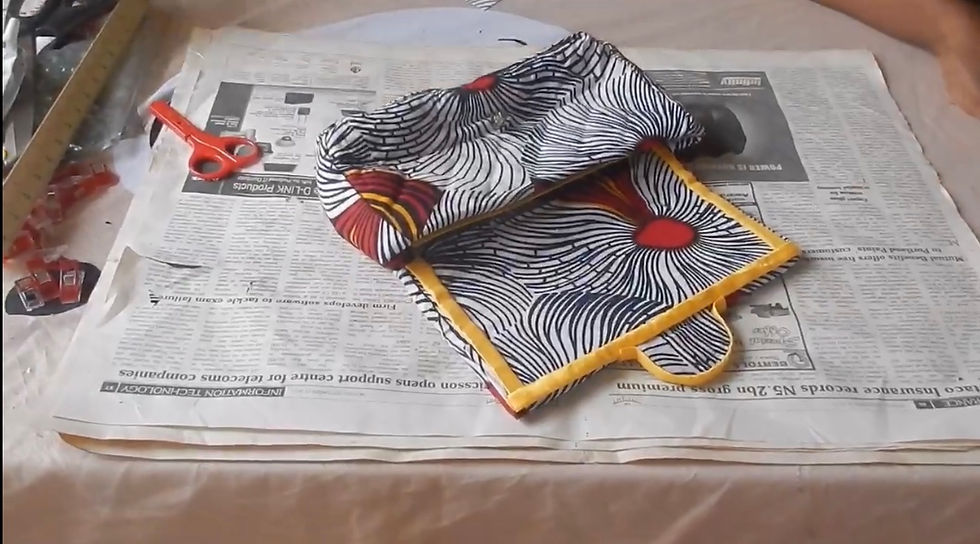
Step 19
Insert a long strip of bias inside the chain handle of the bag


Step 20
Mark the points where the holes for the handle of the bag fall and puncture through the fabric at those points. Insert your new handle and seal it.

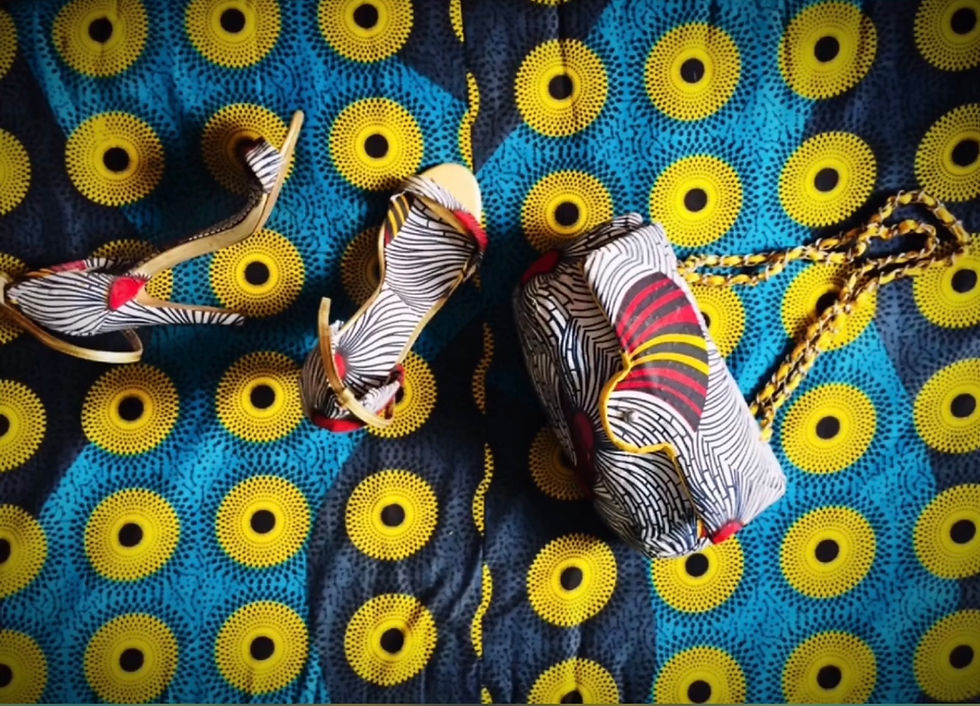
Final Look!
General Tips
* Allow about 20 - 30 minutes in between steps for the glue to dry properly before moving onto the next step.
* Place a heavy flat object with a wider surface area (like a book) on the area you want to seal before setting aside to dry.
* Use pegs to hold the inner areas down and in place while it dries.
* Use a glue that doesn’t soak wet when applied. I use top bond for this DIY.
* Mark an X on the inner side of your cut out fabric pieces to differentiate between the front and the back of the fabric.
* If your bag doesn’t have structure, stuff it with some fabrics while working on this project to give it some structure for accuracy.
Please watch the video below for more details.
Enjoyed this blog post? Share it with a friend!
Replicating this DIY? Tag me on the gram!
Have any other questions? Leave them below and I’ll be sure to respond!
Roll the credits xx


Comments